
Using MYIO
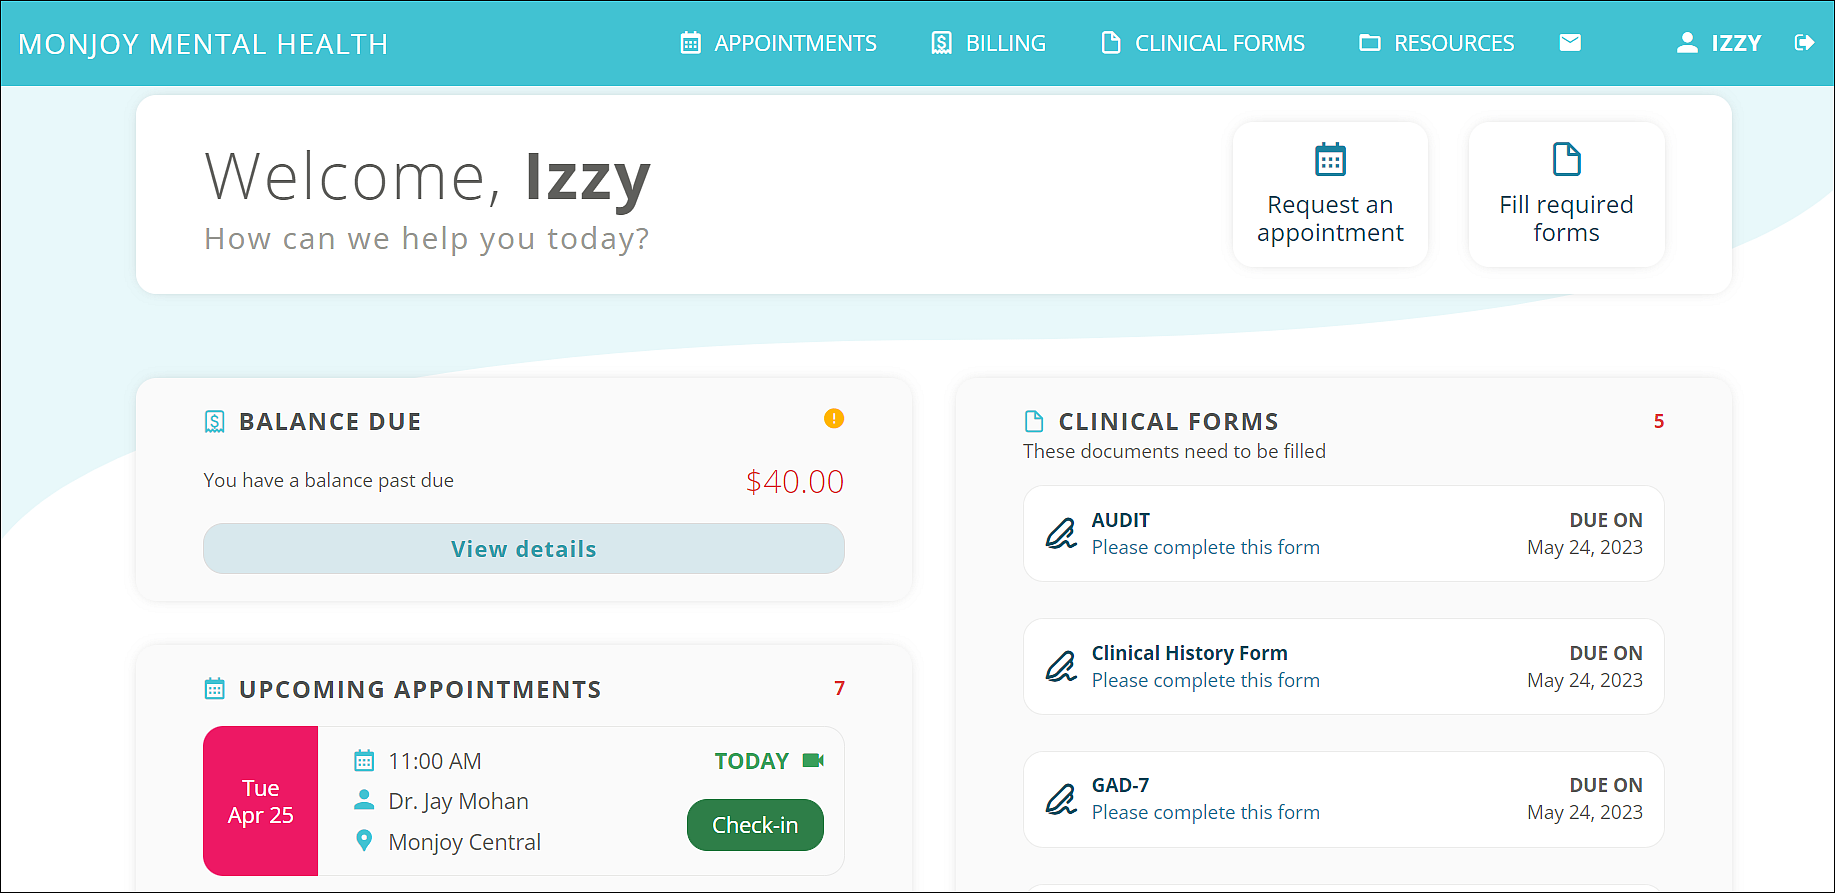
Welcome Screen
If using a browser, full screen at 100% zoom is the recommended view.
In the top bar, you can click on the practice name to return to the welcome screen.
Depending on what your practice has enabled, you may also see links for appointments, billing, clinical forms, and resources. The envelope icon will take you to your secure messages.
Clicking the arrow icon will log you out of MYIO.
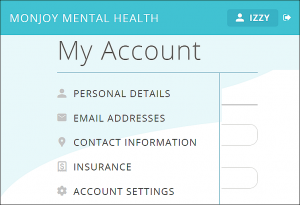
My Account
To view and edit personal details, contact information, insurance information, click your name in the top right of the browser.
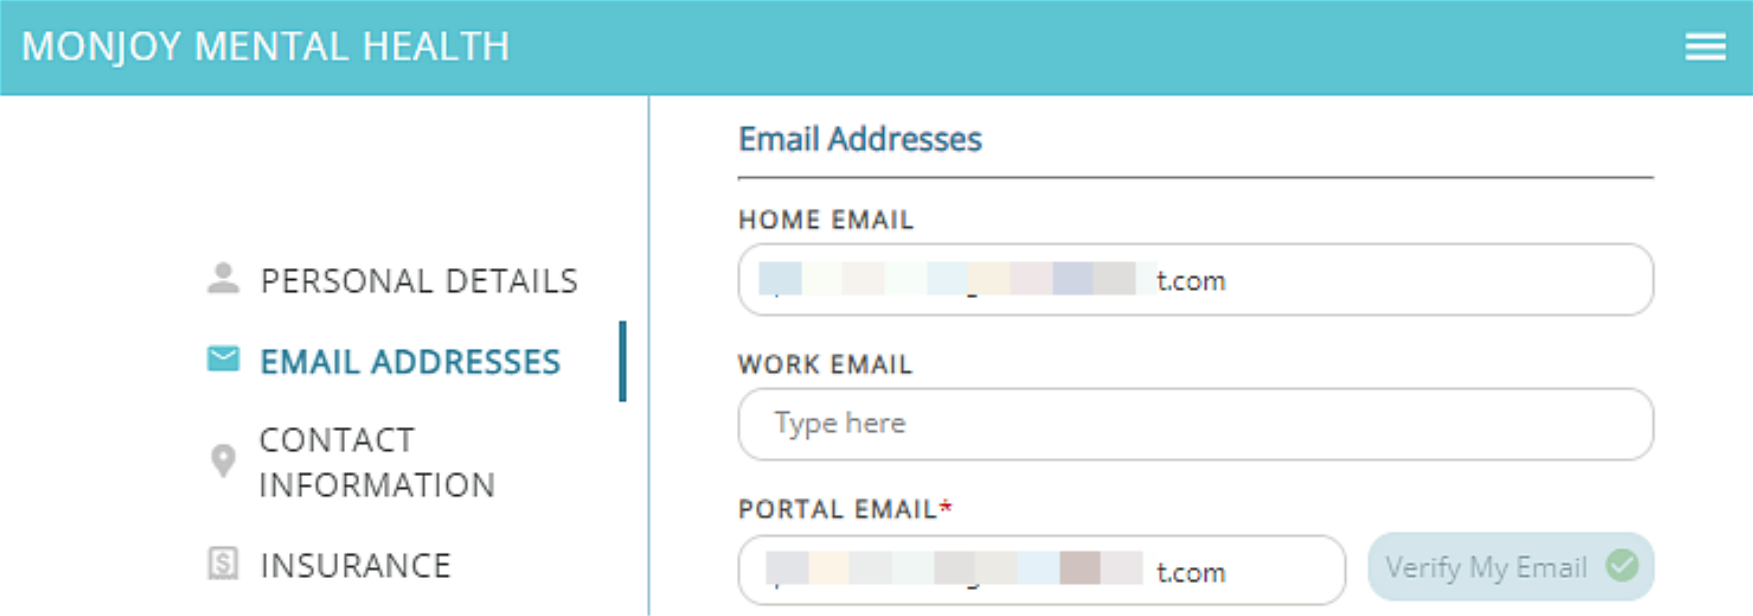
Email Addresses
The portal email is used to reset your MYIO Password or to receive any communication regarding updates, messages, or shared documents available in your MYIO account.
Use the Email Addresses screen in My Account to update or ensure that your portal email address is an email address that only you can access
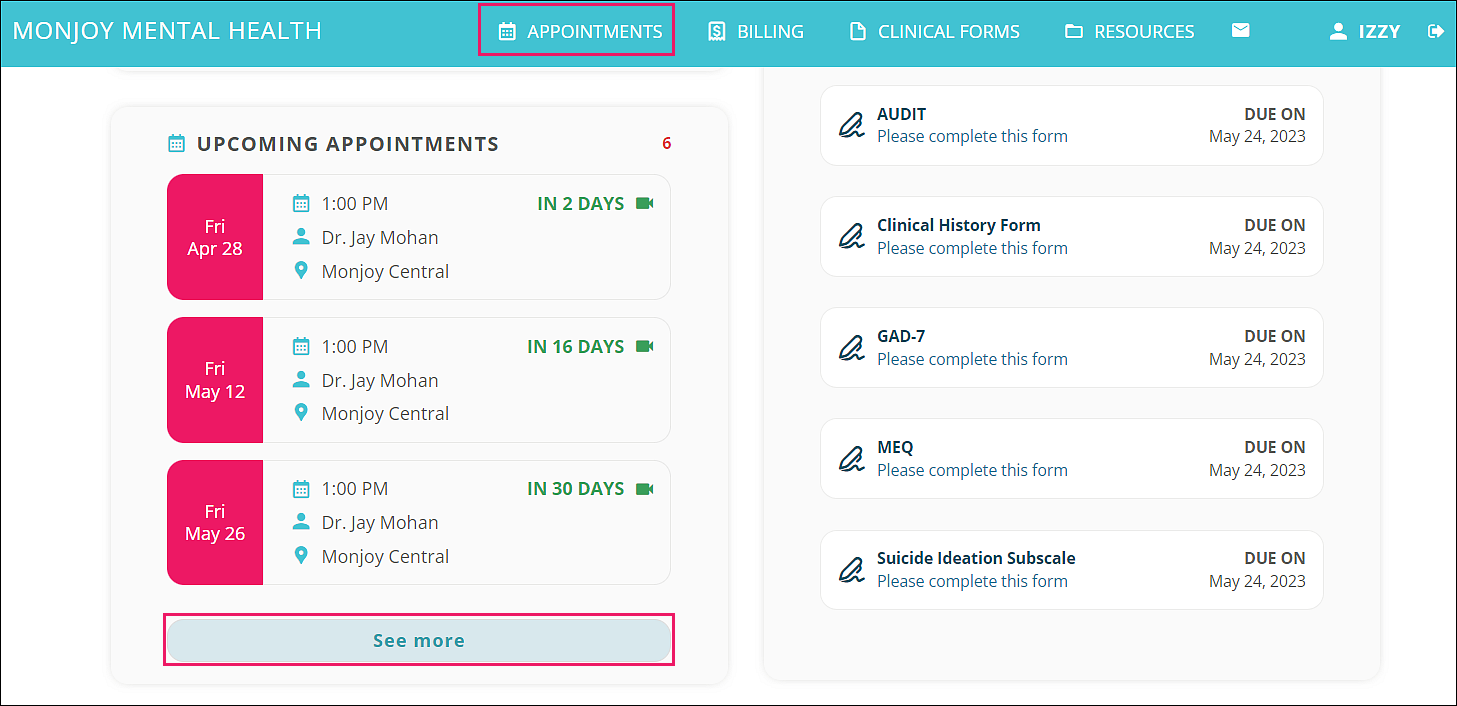
Appointments
To view, check in to, and request appointments, click “Appointments” on the top banner. You can also click “See more” under “Upcoming Appointments” on the welcome screen.
Self-check-in and appointment requests are enabled or disabled by your practice.
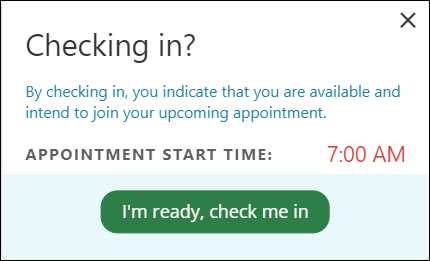
Check In (if enabled)
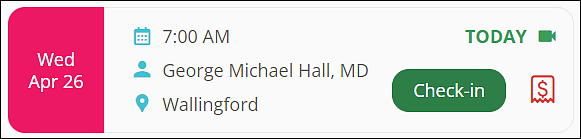
![]() Camera icon – telehealth appointment. If the camera icon is present, you will be prompted to join a telehealth session. If the session is a group telehealth appointment, there will be a group icon visible instead of the camera icon.
Camera icon – telehealth appointment. If the camera icon is present, you will be prompted to join a telehealth session. If the session is a group telehealth appointment, there will be a group icon visible instead of the camera icon.
![]() Dollar sign – payment due prior to the appointment. If the dollar sign icon is present, you will be prompted to enter card details for payment.
Dollar sign – payment due prior to the appointment. If the dollar sign icon is present, you will be prompted to enter card details for payment.
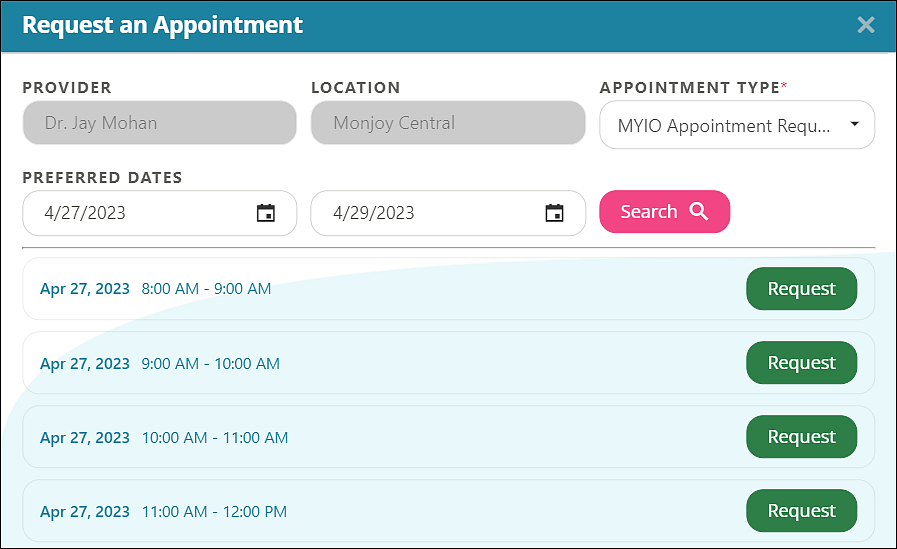
Request an Appointments
(if enabled)
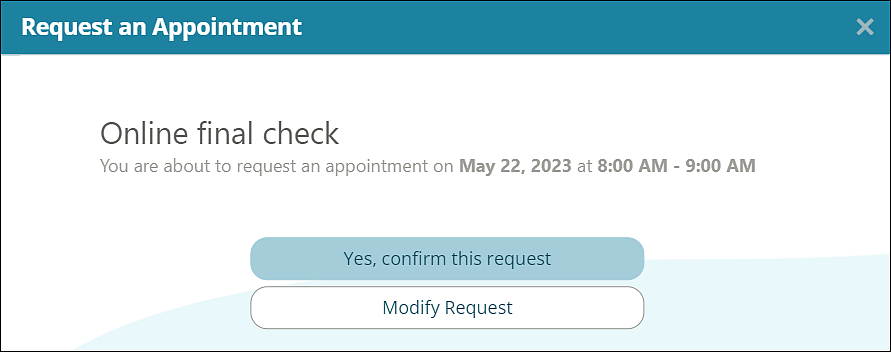
Once a request is submitted, a banner will appear indicating the appointment is not confirmed until you hear back from the practice.
Telehealth
Log into your MYIO portal account.
Supported browsers are Google Chrome and Microsoft Edge. If you are accessing MYIO in a different browser, there will be an error banner, and the telehealth session will not be available.

Check In for the appointment.
![]() Dollar sign – payment due prior to the appointment. If the dollar sign icon is present, you will be prompted to enter card details for payment.
Dollar sign – payment due prior to the appointment. If the dollar sign icon is present, you will be prompted to enter card details for payment.
The provider will receive notification of your check in and will initiate telehealth.
Click the Join Now button (If Group session, wait for provider to admit).
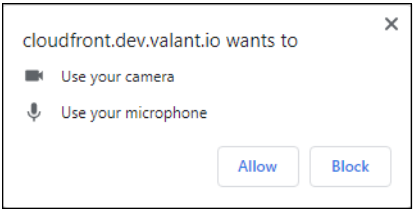
Allow use of camera and microphone in the window that pops up.
• Default view is camera off and microphone muted
• Default audio is device audio settings
• Go to settings and adjust if disallowed in initial prompt
View options – Speaker (one attendee highlighted), Gallery (all participants displayed in grid view)
• There may be more than one screen if Gallery View is selected in a group session
• You will be able to share your screen and contribute to a whiteboard if the provider uses these options in the session
![]() Eye icon top right of screen – hides self-view when clicked
Eye icon top right of screen – hides self-view when clicked
Buttons on bottom bar:

• Mute – when clicked, microphone is off (diagonal line through icon)
• Stop Camera – when clicked, camera is off (diagonal line through icon)
• Participants – shows number of people in the session; when clicked, displays names of participants
• Chat – separate view opens when clicked
– Private (to provider) or to Everyone

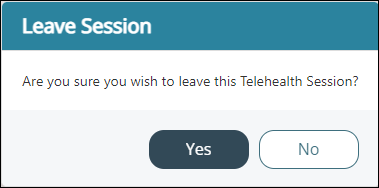
• Leave – click to exit the telehealth session
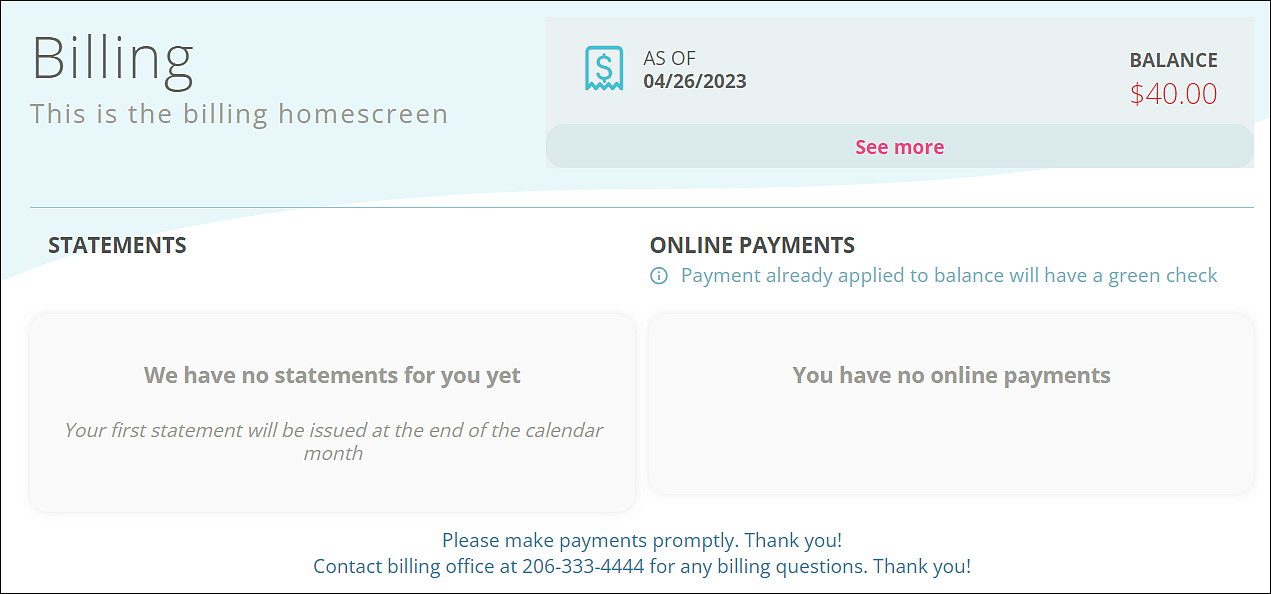
Clicking “See more” opens date ranges of charges due
If Online Pay is enabled
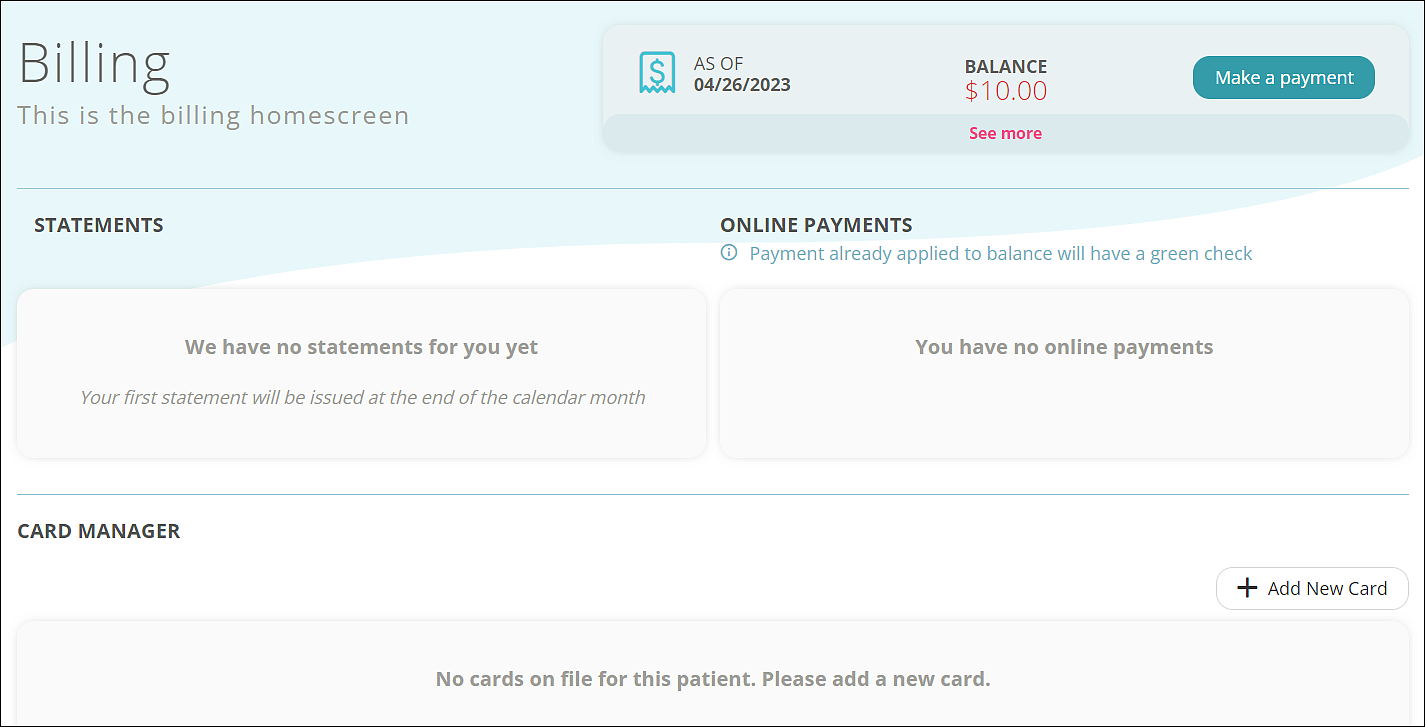
Billing
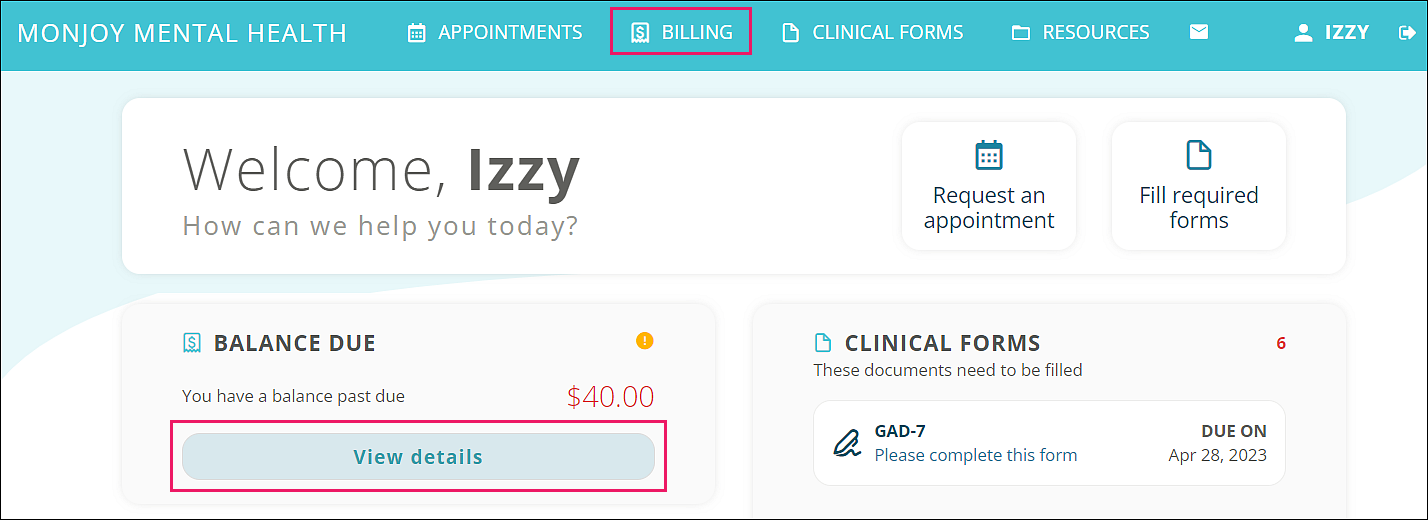
To view or pay your balance, and to enter credit card information, click on “Billing” in the top right menu in the app, or click “Billing” on the banner. You can also click “View details” under the “Balance Due” header on the welcome screen.
To make a payment, click “Make a payment” and select the amount you wish to pay.
Please note, the “Card Manager” and “Make a payment” options will only be available if your provider has activated the credit card online pay function.
The “Card Manager” gives you the ability to save your
card on file with the practice.
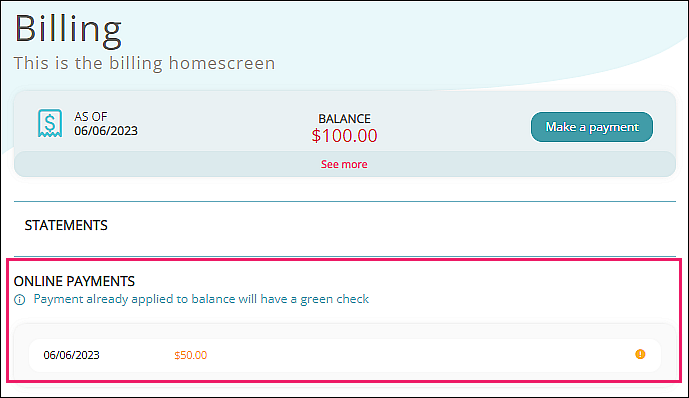
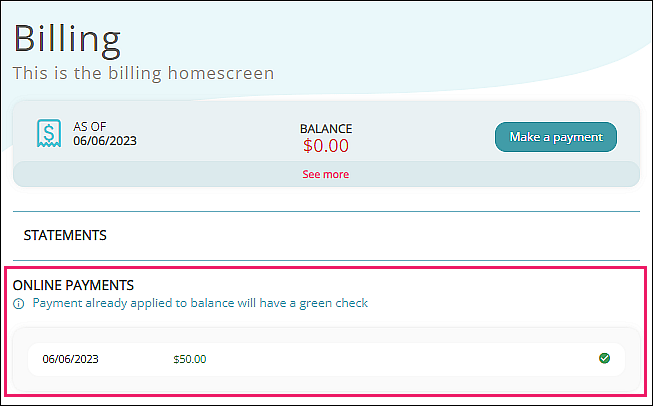
Selecting “Make a payment” allows you to enter a card for payment or use a saved card. Once the payment is submitted, the Online Payment amount will show as pending (yellow). When the practice has posted the payment, it will show as applied (green) and the balance amount will adjust.
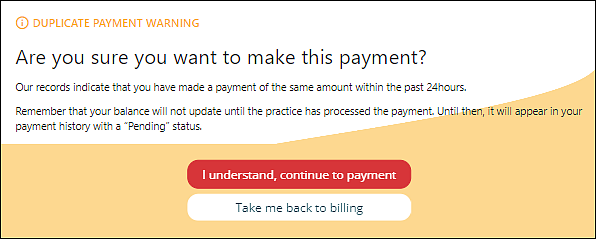
If a payment with the same dollar amount of a payment made in the previous 24 hours is attempted, this warning will appear.
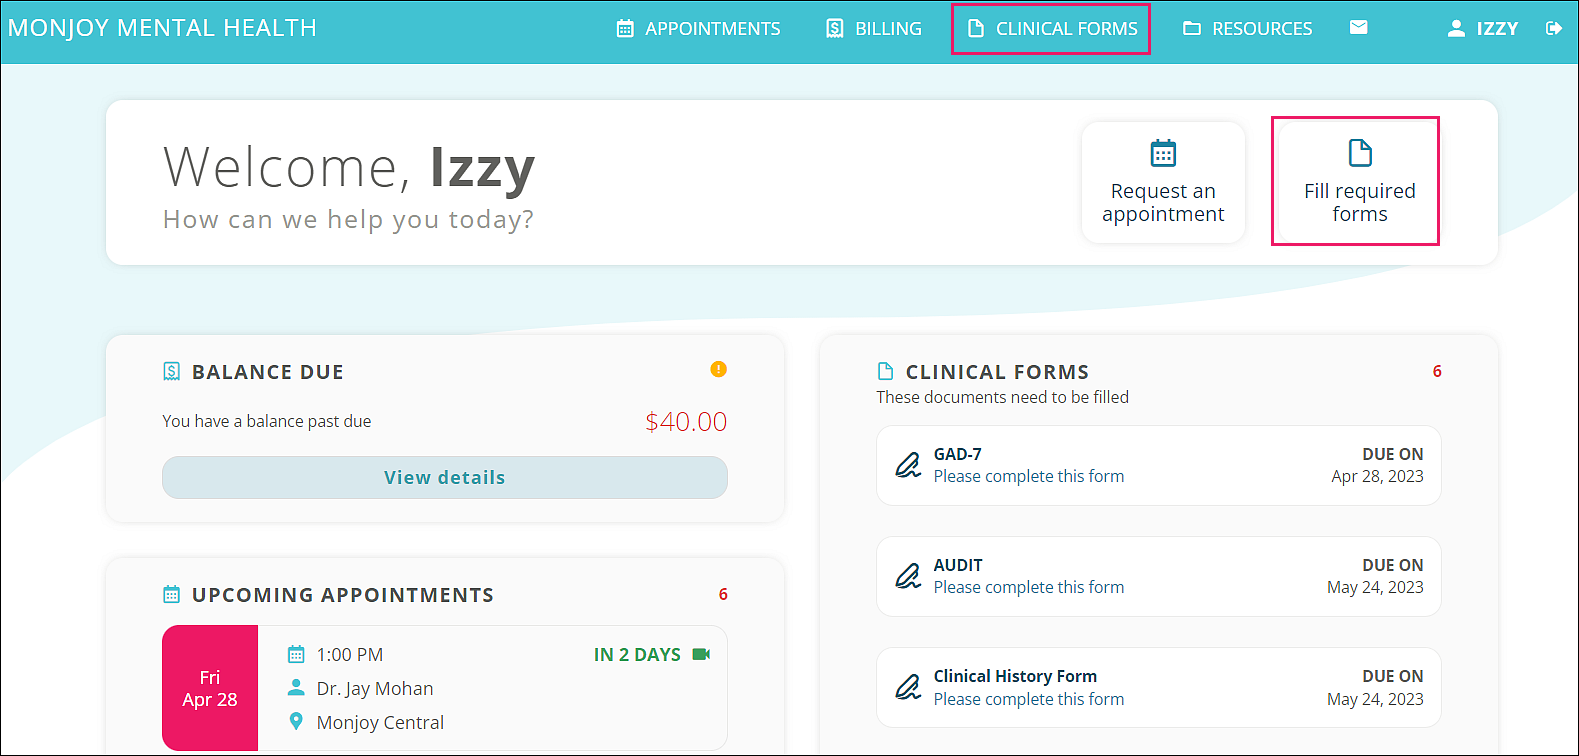
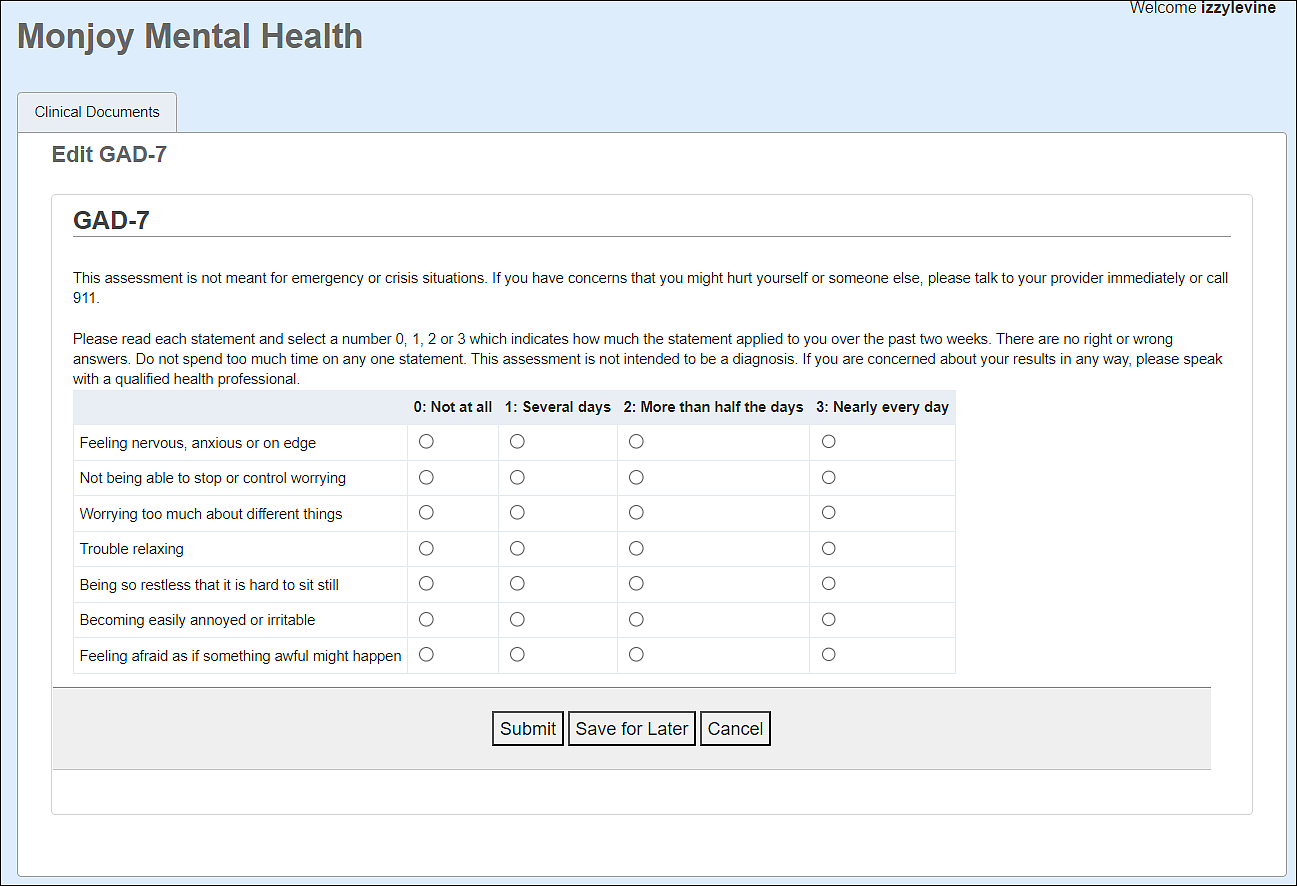
Clinical Forms
To view and complete clinical forms online, click “Clinical Forms” on the top banner or “Fill required forms”.
Click “Start” to complete.
There are two types of clinical forms: Assessments, and eSignature packets.
• Assessments: You have unlimited time to complete the assessment as long as you are actively filling out the form by scrolling, clicking or typing. MYIO will log you out after 60 minutes of browser inactivity.
• eSignature Packet: You have five minutes to sign the document(s) in the packet which opens in a Dropbox Sign window. You may experience a little wait time while those documents are loading.
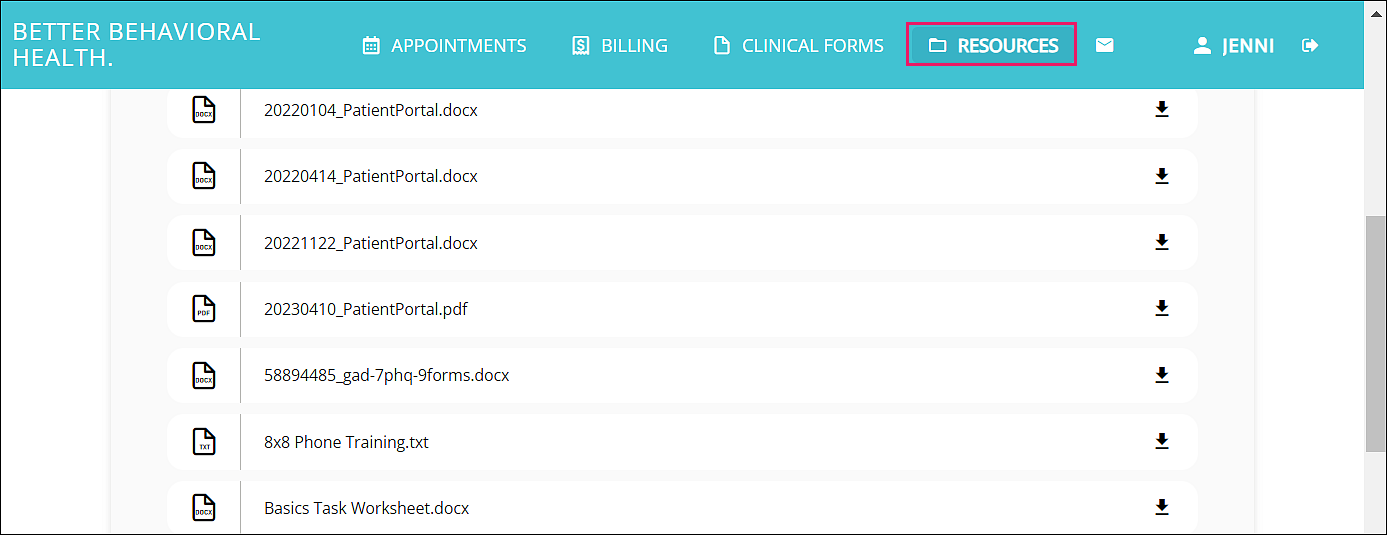
Resources
The documents in this section are populated by your practice. To view resource documents online, click “Resources” on the top banner. Click on the document to download it.
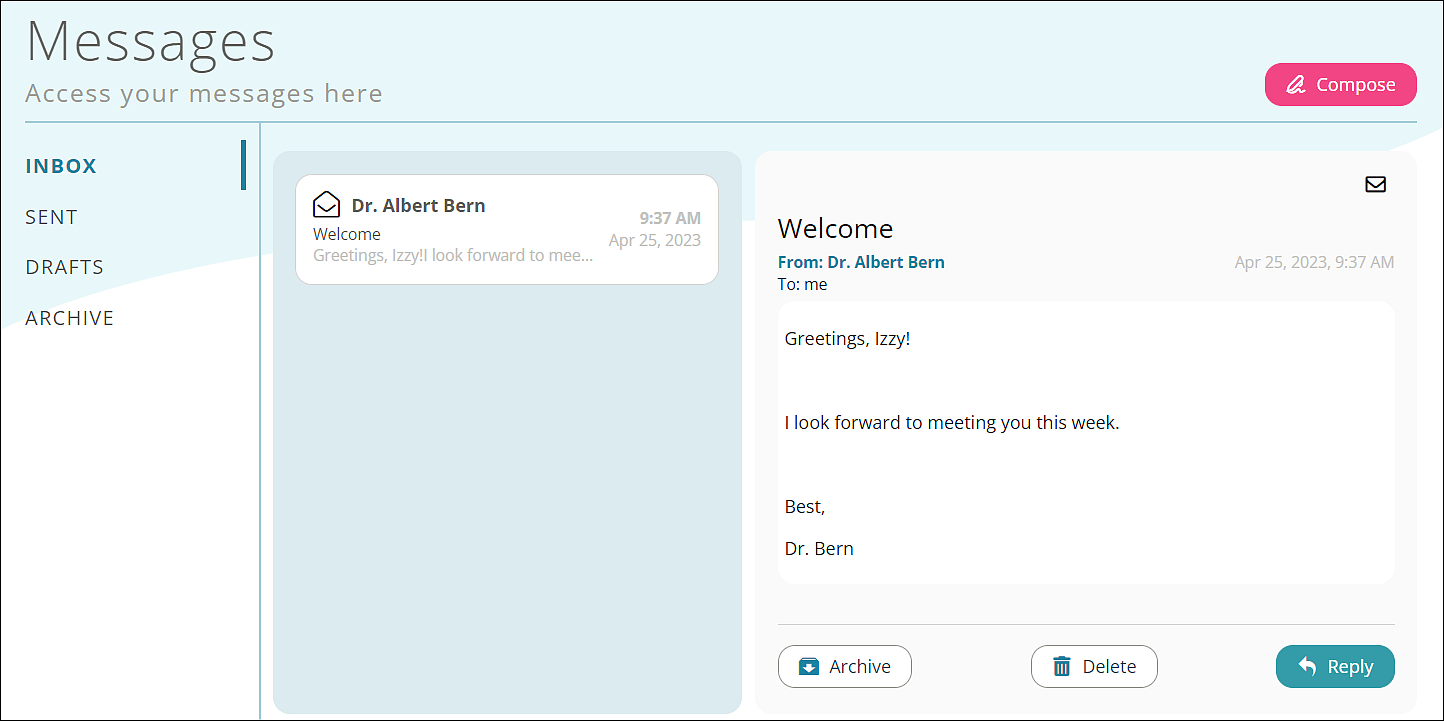
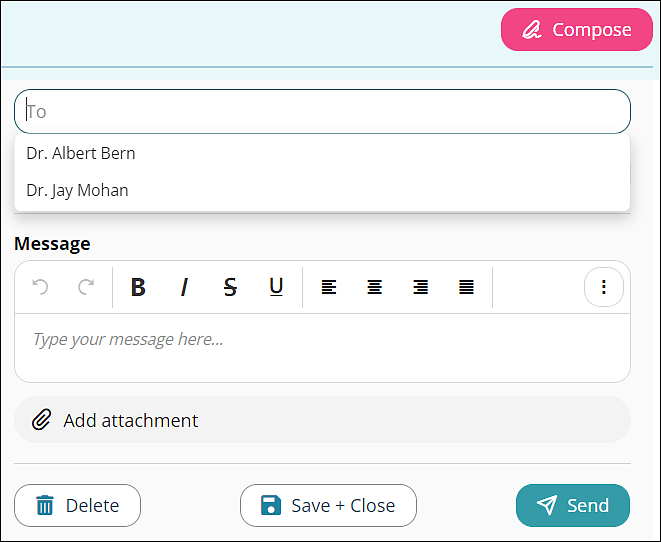
Secure Messages
To view, reply to, compose, and add attachments to messages to your provider, click the envelope icon in the top banner.
Click on a message to see contents and reply.
Caution: Deleted messages are not retrievable
Click the pink “Compose” button to initiate a secure message. Then, you can select recipients (chosen by the practice) from the drop-down list in the “To” field and add attachments. Please note, secure messaging is only available if your practice has enabled it.
